Battlefield Atlas
American Revolution · 1781 Members · from $3

Cowpens, 17 January 1781

On 17 January 1781, in the backcountry of South Carolina, Brigadier General Daniel Morgan's detachment of Continentals and militia — about 1,000 men — turned to fight Lieutenant Colonel Banastre Tarleton's pursuing force of about 1,100 on a cattle-grazing ground called the Cowpens. Using his militia's known habits rather than fighting them, Morgan built three lines along the Green River Road; in less than an hour his men stopped Tarleton's attack, turned it and closed round it in a double envelopment. Nearly the whole British force was killed or captured. The loss of his light troops helped draw Cornwallis into the costly chase across North Carolina that led to Guilford Courthouse and, in the end, to Yorktown.

Open the interactive map7 stages on modern satellite imagery and terrain, with 3D elevation

This battle opens with Battlefield Enjoyer ($3 a month on Patreon), which unlocks every battle in the atlas and every one added later. Free battles include Yorktown, Waterloo, The Alamo, Antietam, Little Bighorn, Belleau Wood, Omaha Beach, Ia Drang.

The Battle of Cowpens (Ranney, 1845)
The Battle of Cowpens (Ranney, 1845) — William Ranney — public domain

The battle, stage by stage

  1. 17 January 1781, about 7:00 AM

    Dawn: Morgan waits in three lines

    After a night march of about twelve miles, Lieutenant Colonel Banastre Tarleton's 1,100 or so redcoats, Loyalist Legion and dragoons come out of the woods along the Green River Road onto the Cowpens, a frontier grazing ground of open pine and hardwood. Brigadier General Daniel Morgan, with about 1,000 men, has placed them in three lines across the road: riflemen under McDowell and Cunningham as skirmishers, Andrew Pickens' militia behind them, and on the rise Lieutenant Colonel John Eager Howard's Maryland and Delaware Continentals with Virginia militia. William Washington's dragoons wait out of sight behind the hill. Tarleton forms at once, light infantry on the right, the Legion infantry and the 7th to the left, a 'grasshopper' 3-pounder between them, 50 dragoons on each flank.

  2. About 7:00–7:15 AM

    The skirmishers fire and fall back

    Tarleton sends dragoons forward to drive in the skirmish line; the riflemen, shooting from behind trees, empty about fifteen saddles and the horsemen fall back. The British infantry advance with a shout, the two 3-pounders firing. As Morgan ordered, the skirmishers aim at officers, fire a few rounds each and retire to the flanks of Pickens' line, reloading as they go.

  3. About 7:15–7:30 AM

    Two volleys, then the militia retire

    Morgan has asked the militia for just two volleys. They hold until the British are about 50 yards off and fire, aiming for the officers' epaulettes, staggering the line. Then, by plan, they file off around the American left toward the rear. The dragoons on the British right charge the retiring militia, but Washington's cavalry sweeps in from behind the hill and drives them off with heavy loss.

  4. About 7:40 AM

    A misunderstood order

    Tarleton's infantry close with Howard's line and a stiff firefight follows. To overlap the American right, Tarleton commits his reserve, the 71st Highlanders. Howard orders Captain Andrew Wallace's company on his right to turn and face them; in the noise they face about and step back, and the rest of the line, thinking a retreat has been ordered, does the same in good order. Sensing victory, the British break ranks and rush after them. Behind the hill, Pickens' militia are re-forming.

  5. About 7:45 AM

    About face — fire!

    Morgan rides up and points out a new position; on the word the Continentals and Virginians halt, turn, and fire into the oncoming British at about 30 yards. The volley stops the disordered pursuit dead, and many of the leading redcoats go down or throw themselves to the ground. Howard immediately orders a bayonet charge.

  6. About 7:50 AM

    The double envelopment

    Howard's men surge forward with the bayonet. Washington's cavalry crashes into the British right flank and rear, while Pickens' re-formed militia come round the American right and strike the 71st on the British left. The light infantry, Legion infantry and 7th collapse and begin to throw down their arms; the gunners die beside their 3-pounders. Tarleton orders the Legion cavalry, his reserve, to charge, but it turns and leaves the field.

  7. About 8:00 AM

    The 71st surrenders; Tarleton escapes

    Surrounded by Continentals and militia, the Highlanders surrender. Tarleton, with about 40 horsemen of the 17th Light Dragoons and officers, makes a last attempt on the lost guns, then breaks away down the Green River Road; near the road Washington, riding ahead of his men, clashes with British officers and escapes a sword stroke when a servant or bugler fires a pistol. In under an hour Tarleton's force has been destroyed: about 110 killed, some 200 wounded and over 700 captured, with both guns and colours. American losses are commonly given as about 25 killed and 124 wounded (Morgan's own return: 12 killed, 60 wounded).

Weapons

British (Tarleton)

Short Land Pattern musket ("Brown Bess")

Short Land Pattern musket ("Brown Bess")

Smoothbore flintlock musket · 1768–1790s pattern

At Cowpens: Tarleton's infantry, the 7th Foot, the 71st Highlanders and the British Legion, came on with muskets and bayonets after a hard night march. Morgan's plan counted on them charging straight in.

The British infantryman's musket for most of the 18th century. Accuracy beyond about 100 yards was poor, so the tactics were volleys at close range followed by the bayonet, which the Brown Bess was built to carry.

Calibre
.75 (ball about .69)
Effective range
about 50–100 yd against a formed line
Rate of fire
3 rounds a minute, drilled
Photo: Tower (British Ordnance) · Public domain
Light 3-pounder ("grasshopper")

Light 3-pounder ("grasshopper")

Smoothbore muzzle-loading cannon · 18th century

At Cowpens: Tarleton had two light 3-pounders between his infantry. Both were captured at the end of the battle, along with the colours of the 7th.

The smallest field gun of the era, light enough to be hauled by a few men or a single horse and to keep up with infantry. British gunners nicknamed it the "grasshopper" from the way it jumped when fired. Each infantry battalion often had a pair attached.

Shot
3 lb iron round shot, or canister
Range
canister to about 300 yd
Crew
about 5–6 men
Photo: National Park Service · Public domain

American (Morgan)

American long rifle

American long rifle

Rifled flintlock (Pennsylvania / "Kentucky" rifle) · about 1730–1840

At Cowpens: Morgan put his best rifle-armed militia out front as skirmishers, told to aim for the officers (the men with the epaulettes) and fire twice before falling back.

Made by German-American gunsmiths in Pennsylvania for hunting on the frontier. The spiral rifling and a greased patch around the ball made it far more accurate than a musket, but slow to load and too delicate for a bayonet, so riflemen fought as skirmishers and sharpshooters rather than in the line.

Calibre
typically .45–.54
Effective range
200–300 yd in skilled hands
Rate of fire
about 1 round a minute
Photo: Long rifle of William Clark · Missouri Historical Society · Public domain
Short Land Pattern musket ("Brown Bess")

Short Land Pattern musket ("Brown Bess")

Smoothbore flintlock musket · 1768–1790s pattern

At Cowpens: Howard's Continentals and the Virginia veterans carried muskets with bayonets. After their mistaken withdrawal they turned and fired a volley at about 30 yards, then charged with the bayonet.

The British infantryman's musket for most of the 18th century. Accuracy beyond about 100 yards was poor, so the tactics were volleys at close range followed by the bayonet, which the Brown Bess was built to carry.

Calibre
.75 (ball about .69)
Effective range
about 50–100 yd against a formed line
Rate of fire
3 rounds a minute, drilled
Photo: Tower (British Ordnance) · Public domain

Paintings and photographs

The Battle of Cowpens (Ranney, 1845)
The Battle of Cowpens (Ranney, 1845) William Ranney's painting of William Washington's sword fight near the Green River Road, his servant firing a pistol to save him. William Ranney — public domain · source
Daniel Morgan (Peale, c. 1794)
Daniel Morgan (Peale, c. 1794) Brigadier General Daniel Morgan, the Virginia rifleman who planned the battle around his militia. Charles Willson Peale — public domain · source
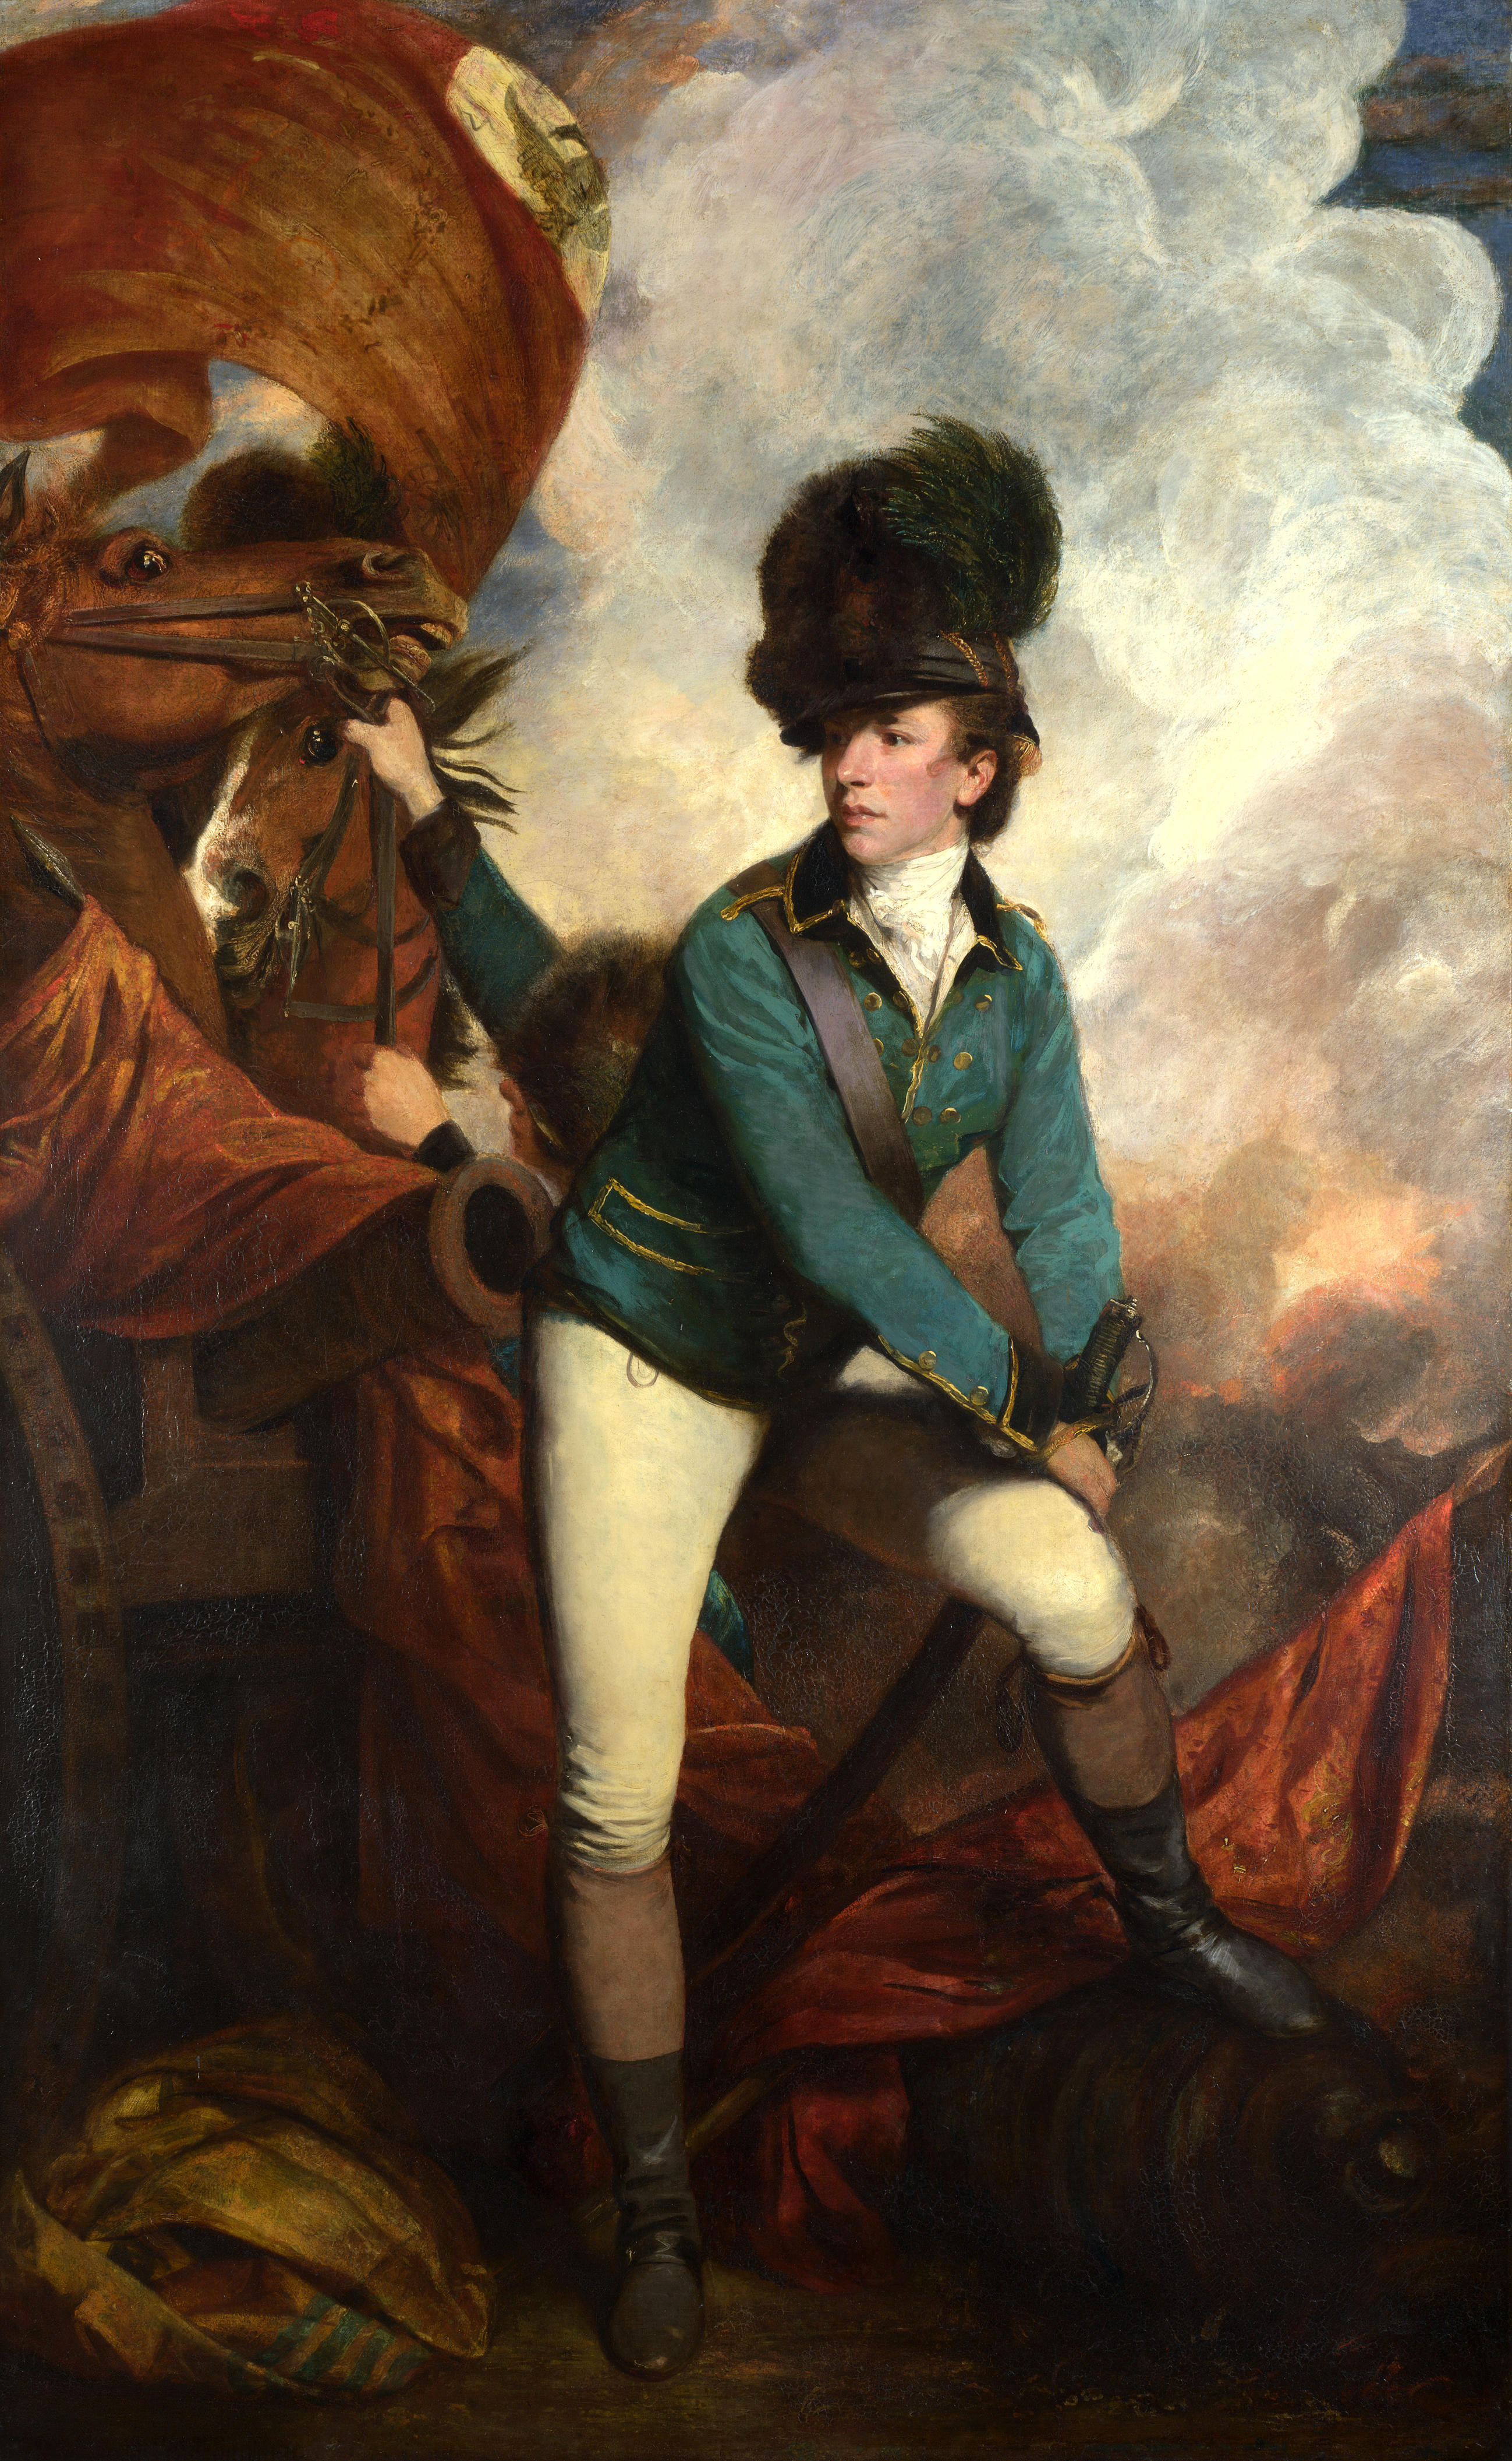
Banastre Tarleton (Reynolds, 1782)
Banastre Tarleton (Reynolds, 1782) Lieutenant Colonel Banastre Tarleton, painted in London the year after Cowpens. Sir Joshua Reynolds — public domain · source

Sources and method

Cowpens, 17 January 1781. Units are placed from the National Park Service wayside exhibits along the Cowpens National Battlefield trail and the Green River Road trace — The Continental Army at Cowpens, Let 'em Get Within Killin' Distance (militia line), Skirmishers Retreat, Form the Line of Battle, The British Army, January 17, 1781 (British right), Sword Clash on Green River Road, The Cavalry (Dragoons) at Cowpens, Colonel Howard's Misunderstood Order and Double Envelopment — and from the 1856 Washington Light Infantry Monument, the U.S. Memorial Monument at the Visitor Center and the Robert Scruggs House, using positions published by the Historical Marker Database (HMdb). Distances between the lines follow Daniel Morgan's report to Nathanael Greene of 19 January 1781 (American Battlefield Trust transcription); the British order of battle follows Tarleton's History of the Campaigns of 1780 and 1781 (1787); strengths and losses follow Lawrence E. Babits, A Devil of a Whipping: The Battle of Cowpens (1998), the NPS Cowpens park interpretation and the Wikipedia summary of these. Estimates of strength vary widely (Morgan reported about 800 men; Babits's muster-roll study finds nearly 1,900). The waysides are interpretive and approximate, the exact lines are unrecorded, and timings are approximate. Paintings from Wikimedia Commons.

Where the positions come from

Approximate locations