Battlefield Atlas
Anglo-Zulu War · 1879 Members · from $3

Isandlwana, 22 January 1879

On 22 January 1879, eleven days after British forces invaded the Zulu kingdom, a Zulu army of about 20,000 men under Ntshingwayo kaMahole and Mavumengwana kaNdlela fell on the camp of Lord Chelmsford's Center Column at Isandlwana, a rock outcrop in what is now KwaZulu-Natal, while Chelmsford was away with about half his force. Lt Col Henry Pulleine's men, joined that morning by Col. Anthony Durnford's mounted troops, met the attack in an extended firing line on the open plain; outflanked by the Zulu 'horns' and pressed by the 'chest', the line collapsed and the camp was overrun in the early afternoon. More than 1,300 of the British force, about half of them regulars of the 24th Regiment and many of them African auxiliaries, were killed; Zulu losses, never counted, are estimated at 1,000 to 3,000. It was the worst defeat of a British force by an indigenous army in the colonial era, and it overshadowed — and was soon overshadowed by — the defense of Rorke's Drift the same night.

Open the interactive map8 stages on modern satellite imagery and terrain, with 3D elevation

This battle opens with Battlefield Enjoyer ($3 a month on Patreon), which unlocks every battle in the atlas and every one added later. Free battles include Thermopylae, Siege of Alesia, Hattin, Agincourt, Vítkov Hill, Bosworth, Fort William Henry, Yorktown, Waterloo, The Alamo, Antietam, Little Bighorn, Belleau Wood, Omaha Beach, Inchon, Ia Drang, 73 Easting, Wanat, Najaf.
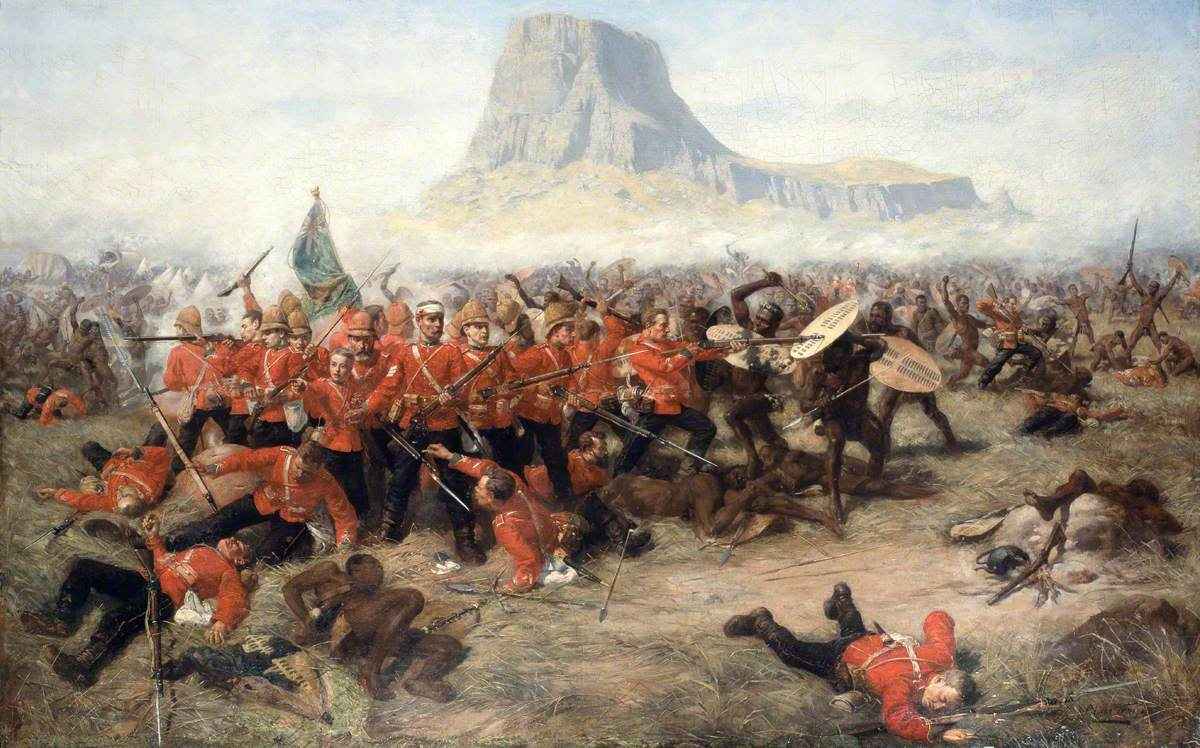
The last stand of the 24th (Fripp, 1885)
The last stand of the 24th (Fripp, 1885) — Charles Edwin Fripp — public domain

The battle, stage by stage

  1. 22 January 1879, dawn to about 10:30 AM

    The column divides

    Lord Chelmsford's No. 3 (Center) Column, which crossed into Zululand at Rorke's Drift on 11 January, has camped since the 20th under the sphinx-like rock of Isandlwana — tents in neat lines along its eastern foot, the wagons unlaagered and no entrenchment dug. Before dawn Chelmsford marches out with about half the column toward Mangeni, some 10 miles to the east-south-east, to support a reconnaissance that has found Zulus there. He leaves Lt Col Henry Pulleine of the 1/24th with five companies of his battalion, one of the 2/24th, two guns, mounted volunteers and police and four companies of the Natal Native Contingent — about 1,200 to 1,300 men. From about 8 AM picquets on the iNyoni heights to the north report Zulus to the north-east, and Pulleine stands his men to on their parade grounds. About 10:30 Col. Anthony Durnford arrives from Rorke's Drift with his No. 2 Column men: five troops of Natal Native Horse, a rocket battery and two companies of the 1st/1st NNC. Unseen, the main Zulu army — about 20,000 men under Ntshingwayo kaMahole and Mavumengwana kaNdlela — rests in the Ngwebeni valley, some seven miles away beyond the heights. The Zulu positions in this stage are conjectural.

  2. About 11:30 AM to noon

    The Zulu army discovered

    Durnford, the senior officer but with no clear orders to take over the camp, decides to act against the Zulu groups reported on the heights. He sends two troops of Natal Native Horse under Lts Charles Raw and Joseph Roberts, with Capt. George Shepstone, up onto the iNyoni plateau, and himself rides east across the plain with two more troops, his rocket battery and its NNC escort following behind. Lt Charles Cavaye's E Company of the 1/24th goes up onto the spur north of the camp, about 1,200 yards out (Capt. Essex's evidence), with a section under 2nd Lt Edwards Dyson about 500 yards further left. Chasing a party of Zulus herding cattle, Raw's men ride over a rise and find the valley below full of warriors — the uKhandempemvu, by most accounts, who rise and come on. Whether the Zulu commanders meant to fight that day, or (as some historians now argue) were already closer and partly deployed, remains debated; Zulu testimony says the army had not planned to attack on the 22nd.

  3. About 12:15 PM

    The horns of the buffalo

    The Zulu army deploys on the run in its classic formation, the 'horns of the buffalo'. The chest — the uKhandempemvu with the uMbonambi and uNokhenke — spills over the edge of the iNyoni escarpment toward the camp; the right horn (the uDududu, iSangqu and iMbube) swings west behind the heights, out of sight, to come round behind Isandlwana; the left horn (the iNgobamakhosi and uVe) streams down onto the plain to the east. The Undi corps follows as a reserve. Raw's horsemen fall back firing. Out on the plain Durnford meets the left horn and begins a fighting withdrawal. The rocket battery, which had fallen behind him, is caught below the escarpment near Amatutshane (Conical Hill): it gets off only one rocket by Capt. Nourse's evidence (some accounts say a few more) before a volley scatters the mules and escort, and Maj. Francis Russell is killed. Mostyn's F Company climbs to join Cavaye; the guns move to a rise in front of the camp and open fire on the chest.

  4. About 12:30 to 12:45 PM

    The firing line

    Called back off the spur, the companies form an extended firing line on the plain in front of the camp. By the standard reconstruction it is roughly L-shaped and about 1.5 miles long: Younghusband's C Company on the left near the foot of the hill, then Mostyn and Cavaye facing north toward the escarpment, the two 7-pounders on a rise, Porteous's A and Wardell's H Companies around the angle, NNC companies in the gaps, and Pope's G Company of the 2/24th on the right. Far out on the right, and some way back, Durnford's horsemen and the mounted volunteers dismount in the Nyogane donga and hold the left horn with carbine fire. For a time the Martini-Henry volleys and shellfire pin the Zulu chest in the long grass and dongas a few hundred yards out. Historians disagree about where exactly the companies stood (Mike Snook draws a tighter line nearer the camp); the positions shown are approximate.

  5. About 1:00 PM

    The line gives way

    The British position unravels from the right. Running short of ammunition, and outflanked as the uVe and iNgobamakhosi work round to the south, Durnford's men leave the donga and fall back toward the camp, leaving Pope's company with its flank in the air. Pulleine orders the line to retire on the camp; the NNC in the angle break first. By Zulu accounts it is now that the induna Mkhosana kaMvundlana rallies the pinned uKhandempemvu, which surges forward with the rest of the chest as the firing slackens. Why the fire failed is long argued: Chelmsford's circle blamed ammunition boxes that could not be opened, a story most modern historians reject; others stress the distance to the wagons, the thinly spread line, powder smoke, and simple numbers. Out of sight behind Isandlwana the right horn reaches the rear of the camp; Shepstone's horsemen, sent to meet it on the western slopes, are overwhelmed.

  6. About 1:15 to 2:30 PM

    The camp overrun

    The right horn closes the nek and cuts the road to Rorke's Drift while the chest and left horn break into the tent lines. The fight becomes a series of isolated stands among the tents and wagons. Durnford is killed with Natal Carbineers and mounted police around him (his body was found in the 1/24th lines); Pulleine dies in the camp; a body of the 24th forms a square on the nek; Younghusband's C Company falls back along the shoulder of the mountain and is cut down at its south-eastern corner, by several accounts the last to fall. The guns try to escape and are lost in a donga on the fugitives' route. About 2:30 a partial eclipse darkens the sun, which Zulu veterans remembered. Lt Teignmouth Melvill, the 1/24th's adjutant, rides off with the battalion's Queen's Color. The cairns that cover the British dead today lie thickest here, around the camp and the nek.

  7. About 1:30 to 4:00 PM

    The Fugitives' Trail

    With the road cut, survivors flee south-west over rough ground — across the Manzimnyama stream and the Mpete ridge — toward the flooded Buffalo River, about six miles away, pursued and cut down as they go. At the crossing now called Fugitives' Drift Melvill is swept off his horse holding the cased Color; Lt Nevill Coghill rides back to help. Both are killed on the Natal bank, and the Color is carried away downstream. Pte Samuel Wassall of the 80th, a mounted infantryman, turns back under fire to pull Pte Westwood from the river (Victoria Cross, gazetted 17 June 1879). Only about 55 to 75 Europeans escape. Meanwhile the Undi corps reserve, which has not been engaged, moves on to cross the Buffalo, the iNdluyengwe at the drift and the rest upstream, and goes on to attack the post at Rorke's Drift at about 4:30 PM.

  8. Evening of 22 January 1879 and after

    Return to a silent camp

    Warned by messengers and distant views of the fighting, Chelmsford brings his force back at dusk, shells the empty camp, and bivouacs among the dead on the nek; Maj. Black's 2/24th companies hold Mahlabamkhosi. Before dawn they march for Rorke's Drift, passing withdrawing Zulus without a fight. The British force lost more than 1,300 killed — the heritage-register record gives 52 officers, 806 white NCOs and men and 471 African troops and non-combatants. Zulu dead are unknown: estimates run from about 1,000 (Knight) through 1,500–2,000 (Lock and Quantrill; Snook) to about 3,000 (older and heritage-register figures), with many more wounded. The Queen's Color was recovered from the river on 4 February; Melvill and Coghill were named in a memorandum of 2 May 1879 and received posthumous Victoria Crosses in 1907. The dead were not buried until May and June.

Then and now: how the ground has changed

The hill, the nek, the iNyoni escarpment and the plain are little changed and still open grassland used for grazing. Since 1879 the ground has gained white-painted cairns, memorials, a reserve fence, gravel roads, a museum, a lodge on the iNyoni slopes and rural homesteads around the reserve's edges.

The interactive map can show the period landscape (3 shapes: Isandlwana village and museum, north of the camp (scattered buildings, approximate), Homesteads east of the camp, toward Amatutshane and the Nyogane donga (approximate), Homesteads south of Mahlabamkhosi, on the start of the fugitives' route (approximate)) under the units. Open the map.

Weapons

Zulu army (Ntshingwayo)

Iklwa and isihlangu

Iklwa and isihlangu

Stabbing spear and war shield · Zulu kingdom, 1820s–1879

At Isandlwana: The amabutho attacked with stabbing and throwing spears behind cowhide shields; some warriors carried firearms.

Zulu regiments closed fast to fight hand to hand with the stabbing spear behind the great cowhide shield; many warriors also carried throwing spears, clubs and some firearms. At Isandlwana the amabutho advanced in the 'horns of the buffalo' formation.

Iklwa
short-hafted stabbing spear with a long blade
Throwing spears
lighter spears thrown before closing
Shield
tall cowhide isihlangu, colored by regiment
Photo: Royal Institution of Cornwall, Portable Antiquities Scheme · CC BY-SA 2.0

British force (Pulleine and Durnford)

Martini-Henry rifle

Martini-Henry rifle

Single-shot breech-loading rifle · 1871–1890s (British service)

At Isandlwana: The companies of the 24th fired volleys from the extended firing line.

The standard British infantry rifle of the Anglo-Zulu War, firing a heavy soft lead bullet. At Isandlwana the companies of the 24th held the Zulu chest at a distance for some time; how far ammunition supply contributed to the collapse is still argued.

Caliber
.577/.450
Action
falling block, lever-operated
Effective range
volley fire to 1,000 yd and more
Photo: Armémuseum (Swedish Army Museum) · Public domain

Paintings and photographs

The last stand of the 24th (Fripp, 1885)
The last stand of the 24th (Fripp, 1885) Charles Edwin Fripp's painting of the 24th Regiment's last stand, a Victorian imagining (National Army Museum). Charles Edwin Fripp — public domain · source
A Zulu regiment attacking (Fripp)
A Zulu regiment attacking (Fripp) Fripp's drawing of a Zulu regiment advancing at Isandlwana. Charles Edwin Fripp — public domain · source
Isandlwana hill and battlefield
Isandlwana hill and battlefield The battlefield today, with the white cairns marking where the British dead were buried. Michael Gundelfinger — CC BY-SA 4.0 · source
Colonel Durnford
Colonel Durnford Col. Anthony Durnford, Royal Engineers, who arrived with No. 2 Column on the morning of the battle and was killed in the final fighting. Public domain · source
Melvill and Coghill (Fripp)
Melvill and Coghill (Fripp) A Victorian depiction of Lieutenants Melvill and Coghill trying to save the Queen's Color of the 1/24th. Public domain · source

Free for everyone every year on its anniversary: January 22.

Accuracy score: 61/100 (moderate)

How the accuracy score works

Sources and method

Isandlwana, 22 January 1879. Fixed points come from the South African Heritage Resources Information System (SAHRIS): the Isandlwana Battlefield national monument record (with its casualty figures), the military graves and the Isandlwana Memorial records; the summit and the saddle to the iNyoni spur from PeakVisor; the battlefield geography (camp on the eastern foot, the nek, Mahlabamkhosi, Conical Kop about 2 km east, the plateau about 2 km north, the cairns and the fugitives' route) from the Isandlwana heritage impact report (Green Door, 2016, for Amafa/SAHRA); and the Melvill and Coghill memorial position from komoot. Contemporary evidence: the court of inquiry evidence and Capt. Essex's report in the London Gazette (March 1879) — Cavaye's picquet about 1,200 yards north, Dyson 500 yards to his left, Mostyn between, the fall-back of about 400 yards, Younghusband in echelon, Nourse's account of the rocket battery, Curling's two guns. Modern accounts: G.A. Chadwick, 'The Anglo-Zulu War of 1879: Isandlwana and Rorke's Drift', Military History Journal 4/4 (1979); P.S. Thompson, 'The Many Battles of Isandlwana: A Transformation in Historiography', Historia (on the debates among Knight, Laband, Lock and Quantrill, Snook and others, and on the limits of Zulu testimony); the Talana Museum account (line about 1.5 miles long; 52 officers and 1,277 men killed); Pat Rundgren's articles in The Heritage Portal (the fighting behind the mountain, the lost guns) and on the Martini-Henry and ammunition; 'Durnford's Last Stand' and 'The Missing Hours at Isandlwana' (Heritage Portal); 'Isandlwana: the missing five hours' (Zulu statements of Mehlokazulu, Umtyolalo, Mhoti and others). Archaeology: the University of Glasgow and Amafa survey led by Tony Pollard with Len van Schalkwyk (Mail & Guardian, 2000), which found cartridge cases suggesting a fall-back toward the camp and rejected the 'screwed-down ammunition box' story. Zulu regiments: John Laband, Kingdom in Crisis (1992) and Ian Knight's studies; the amabutho that fought at Isandlwana. Victoria Crosses: the London Gazette (Melvill and Coghill, 1907) and Wassall (17 June 1879); the Queen's Color from the Royal Welsh Museum; the Zulu memorial from the South African War Memorials project and The Heritage Portal. Strengths are attributed ranges; Zulu dead are a guess in every source. Positions of the Zulu army before noon, the exact firing line, Durnford's donga and the fugitives' route are approximate. Images from Wikimedia Commons.

Where the positions come from

Further reading