Battlefield Atlas
The Crusades · 1191 Members · from $3

Arsuf, 1191

On 7 September 1191, during the Third Crusade, Richard I of England's army was marching south along the coast from Acre toward Jaffa when Saladin attacked it from the Forest of Arsuf, north of modern Herzliya. For hours the Crusaders held their order under the arrows of the Ayyubid horse archers, the Hospitaller rearguard bearing the worst of it, until the Hospitallers charged — reportedly without orders — and Richard committed his whole force of knights in support. Three charges drove Saladin's army from the field. The battle did not destroy the Ayyubid army, but it showed that Saladin could be beaten in the open, secured Jaffa for the Crusaders, and shaped the truce that ended the crusade a year later. Positions are a reconstruction from the chronicles and from the battlefield archaeology of Rafael Lewis; numbers on both sides are disputed.

Open the interactive map8 stages on modern satellite imagery and terrain, with 3D elevation

This battle opens with Battlefield Enjoyer ($3 a month on Patreon), which unlocks every battle in the atlas and every one added later. Free battles include Hattin, Yorktown, Waterloo, The Alamo, Antietam, Little Bighorn, Belleau Wood, Omaha Beach, Ia Drang.

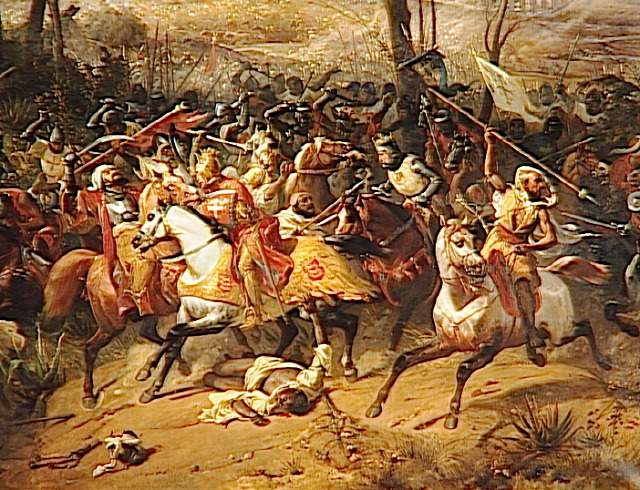
The Battle of Arsuf (Féron, 1843)
The Battle of Arsuf (Féron, 1843) — Éloi Firmin Féron — public domain

The battle, stage by stage

  1. 22 August – 6 September 1191

    The fighting march

    After the fall of Acre in July, Richard I of England leads the Crusader army south along the coast toward Jaffa, the port for Jerusalem. Before leaving, on 20 August, he has about 2,700 Muslim prisoners of the Acre garrison executed outside the city when the ransom terms lapse — an act both Latin and Arabic chroniclers record. The march starts on 22 August, the fleet keeping pace offshore and the sea guarding the right flank. Saladin's army shadows it, its horse archers harassing the column day after day in the late-summer heat; by one account Richard is grazed by a javelin. On 5 September, Baha al-Din reports, Richard meets Saladin's brother al-Adil under truce, but the talks fail. On the night of 6 September the army camps at the mouth of the Nahr al-Faliq — the Crusaders' 'Rochetaillée', today's Poleg stream — with a marsh covering its eastern side. Arsuf lies about 8 km to the south.

  2. 7 September 1191, early morning

    Order of march

    Ayyubid scouts can be seen on every side; Saladin's main army is waiting in and behind the Forest of Arsuf, an oak woodland on the low sandy ridges inland. The Crusaders must cross a plain between the forest and the sea that the chroniclers make one to two miles wide. Richard marches his roughly 1,200 knights in twelve squadrons, grouped (the exact grouping is uncertain) behind the Templars under Robert de Sablé in the van; then the Bretons and Angevins, the Poitevins under Guy of Lusignan, the English and Normans around the great standard on its wagon, the French, Flemish and Syrian barons, and the Hospitallers under Garnier of Nablus as rearguard. The infantry — modern estimates put the whole army at about 10,000–20,000 — form a screen on the landward side with the crossbowmen outermost, while the baggage and half the foot, resting in turn, march by the sea. Richard and Hugh of Burgundy ride up and down the column; Henry of Champagne watches the hills.

  3. 7 September, about 9 AM

    Out of the woods

    Soon after the march begins, Saladin's army comes out of the woods. Baha al-Din, who was with the Ayyubid centre, describes it drawn up in a right wing, centre and left wing; ahead of it come Bedouin and Sudanese foot archers and javelin-men, then swarms of Turkish horse archers, with drums, cymbals and trumpets. Saladin's army — perhaps 25,000, nearly all cavalry, by modern estimates (the Itinerarium's 300,000 is not credible) — tries to break the column's order or provoke the knights into a scattered charge. The Crusaders keep marching, and their crossbowmen keep the archers at a distance.

  4. 7 September, late morning – early afternoon

    The rearguard under pressure

    The weight of the attack falls on the rear. The Hospitallers, losing horses to the archers, are forced to march almost backward to face the enemy, and the crossbowmen and archers of the rearguard fight as they walk. The Itinerarium says the column was so thickly shot at that the arrows covered the ground. Garnier of Nablus twice sends to Richard asking leave to charge; Richard, wanting the Ayyubid horsemen closer and more tired, tells him to hold until a signal of six trumpet blasts.

  5. 7 September, mid-afternoon

    The Hospitaller charge

    As the vanguard reaches the orchards of Arsuf, the rear is at breaking point. The Marshal of the Hospital and Baldwin le Caron, a knight of Richard's household, charge without waiting, crying 'St George!'. The other Hospitallers follow, and the French and Flemish squadrons ahead of them turn and charge too, the infantry opening lanes to let them through. The traditional story is of disobedience under intolerable pressure; some historians suggest Richard had left his commanders room to seize the moment, and it is uncertain whether a trumpet signal could be heard over the Ayyubid drums. The blow hits the Ayyubid right wing, many of whose horse archers had dismounted to shoot.

  6. 7 September, mid-afternoon

    Richard's general charge

    Richard sees that the charge must be supported or the Hospitallers will be overwhelmed, and sends the whole line of knights after them. The Ayyubid right wing breaks, and the centre and left give way. Baha al-Din, in the centre, saw it turn in flight and rode to the left wing, which was fleeing too. Richard halts the knights after about a mile (some 1.5 km) so they do not scatter in a reckless pursuit, keeping the English and Normans by the standard as a reserve. Lewis's 2013–14 survey found arrowheads, a probable helmet plate and a horse fitting in the fields north-east of Arsuf, near the line of this fighting.

  7. 7 September, late afternoon

    Rally and the last charges

    The Ayyubids rally. Taqi al-Din, Saladin's nephew, leads some 700 of the Sultan's own guard against the Crusaders' left; Saladin, by Baha al-Din's account left with only seventeen guards and a drummer, has his banners raised to gather the scattered men. Richard regroups and charges a second time, and the Ayyubids give way again; a third charge drives them into the woods and the hills beyond. The Itinerarium pictures Richard in the thick of the fighting. James of Avesnes, a lord of Hainaut, is unhorsed and killed — by Ambroise's account after cutting down fifteen enemies — the only Crusader leader of note to fall.

  8. 7–10 September 1191

    Arsuf and the road to Jaffa

    The army camps at Arsuf. Losses are uncertain: Christian chroniclers claim 7,000 Ayyubid dead and 32 emirs — likely too many — while Baha al-Din names emirs who fell, among them Musek, Qaymaz al-Adili and Lighush; the Crusaders reportedly lost about 700. Next day men go back to recover James of Avesnes, who is buried in Arsuf. Saladin's army is beaten but not destroyed. On 9 September the march resumes to the Nahr al-Auja (Yarkon), and on about 10 September the Crusaders enter Jaffa, whose walls Saladin had demolished, and begin to rebuild them. The victory restored the army's confidence and its hold on the coast, but did not open the road to Jerusalem; the war ended with the Treaty of Jaffa in 1192.
Weapons

Mailed knight and couched lance

Mailed knight and couched lance

Heavy cavalry · 11th–13th centuries

DOPE HISTORY — Richard's charge: After a day of letting the column absorb the arrows, the Hospitallers broke ranks and charged, and Richard turned it into a general charge. The massed knights broke the Ayyubid right wing, where many archers had dismounted to shoot, then halted and re-formed before charging again.

With the lance couched under the arm, a knight put the weight of man and horse behind the point. A massed charge could break almost any enemy that stood to receive it, so Muslim commanders tried to avoid it, scattering and shooting at the horses instead.

Armour
mail hauberk, helmet, kite or heater shield
Weapon
lance held under the arm, then sword or mace
Weakness
unarmoured horses; heat and thirst
Photo: Morgan Picture Bible, Paris, c. 1250 · Public domain

Ayyubid army (Saladin)

Turkish composite bow

Turkish composite bow

Recurved composite bow · in use for many centuries

At Arsuf: Horse archers shot down so many Crusader horses that unhorsed knights had to join the infantry.

Small, very strong recurved bows built up from horn, wood and sinew. Mounted archers could shoot them at the gallop and wheel away before a charge reached them, the tactic that wore down Crusader columns on the march.

Build
horn, wood and sinew, glued and bound
Use
shot from horseback at the gallop
Range
effective to about 100–150 yd; farther for volleys
Photo: Daderot (a later Ottoman example, Higgins Armory Museum) · Public domain
Straight Islamic sword (sayf)

Straight Islamic sword (sayf)

Straight, mostly double-edged sword · in use for centuries; curved sabres spread later

At Arsuf: Saladin's guard and regular cavalry met the Crusader charges with lance and sword.

Saladin's horsemen fought with straight swords much like the Franks', alongside lance, mace and bow. The curved sabre popularly linked with the Crusades became widespread in the Middle East mainly after the 13th century. This sword is a 13th-century Mamluk example.

Blade
straight, about 80–90 cm
Use
cavalry and infantry sidearm
Note
the curved scimitar of legend became common only after this period
Photo: Dosseman, Istanbul Military Museum (13th-century Mamluk sword) · CC BY-SA 4.0
Mace

Mace

Flanged or knobbed club of iron or bronze · widely used 11th–16th centuries

At Arsuf: The askari heavy cavalry carried maces for close fighting with knights.

A short iron-headed club that delivered crushing blows through mail. The regular cavalry of the Ayyubid army carried maces alongside lance and sword, and Frankish knights used them too. This flanged mace is a later example from the Topkapi Palace collection.

Head
flanged or knobbed metal head
Use
crushing blows that worked through mail
Carried by
heavy cavalry, at the saddle
Photo: Yair Haklai, Topkapi Palace (later example) · CC BY-SA 4.0

Crusader army (Richard I)

Crossbow

Crossbow

Mechanical bow · about 1100–1500 in Western armies

At Arsuf: The infantry and crossbow screen on the landward side kept the horse archers at a distance all day.

A short, powerful bow mounted on a stock and spanned with the feet or a hook, shooting a heavy bolt. It took less skill than a longbow and outranged the Turkish horse archer's bow at close quarters, so Crusader armies used crossbowmen to screen their knights.

Draw
spanned by foot stirrup or belt hook
Range
effective to about 150–200 yd
Rate
about 2 bolts a minute
Photo: Metropolitan Museum of Art · CC0
Mailed knight and couched lance

Mailed knight and couched lance

Heavy cavalry · 11th–13th centuries

At Arsuf: The charges came only when Richard was ready, or nearly; the Hospitallers went early.

With the lance couched under the arm, a knight put the weight of man and horse behind the point. A massed charge could break almost any enemy that stood to receive it, so Muslim commanders tried to avoid it, scattering and shooting at the horses instead.

Armour
mail hauberk, helmet, kite or heater shield
Weapon
lance held under the arm, then sword or mace
Weakness
unarmoured horses; heat and thirst
Photo: Morgan Picture Bible, Paris, c. 1250 · Public domain
Mail hauberk and kite shield

Mail hauberk and kite shield

Body armour and shield · 11th–13th centuries

At Arsuf: Chroniclers describe foot soldiers marching on with arrows sticking in their mail.

A knee-length shirt of riveted iron rings over a padded coat, with a long shield covering the left side. It stopped most cuts and many arrows; chroniclers describe Crusader foot soldiers marching on with arrows stuck in their mail. Heat and thirst were its cost.

Mail
thousands of riveted iron rings, about 10–15 kg
Shield
tall, kite- or flat-topped, wood faced with leather
Under
a padded gambeson
Photo: Walters Art Museum · Public domain
Flat-topped helm (early great helm)

Flat-topped helm (early great helm)

Helmet · late 12th–14th centuries

At Arsuf: A plate from a closed helmet of this new kind was found on the battlefield.

In the 1180s–90s some knights began closing their helmets with a face plate, the start of the great helm, which covered the whole head. A plate from such a helmet is among the finds from the Arsuf battlefield. This museum example is a later, 14th-century helm.

Build
riveted iron plates covering the whole head
Vision
eye slits and breaths
Note
earlier knights wore a conical helm with a nasal
Photo: Deutsches Historisches Museum (14th-century example) · CC BY-SA 3.0
Knightly sword (arming sword)

Knightly sword (arming sword)

Straight, double-edged sword · 10th–14th centuries

At Arsuf: After the lances broke, the charges went on with sword and mace into the Ayyubid wings.

The knight's sidearm once the lance had broken: a broad, double-edged cutting blade with a simple cross guard and a disc or brazil-nut pommel. Swords were costly, prized and often blessed, and the cross shape of the hilt was not lost on men who had taken the cross.

Blade
about 75–90 cm, broad and fullered
Weight
about 1–1.4 kg
Use
one-handed, with a shield, on foot or horseback
Photo: A 12th–13th-century sword, Kostroma museum-reserve · CC0

Paintings and photographs

The Battle of Arsuf (Féron, 1843)
The Battle of Arsuf (Féron, 1843) Éloi Firmin Féron's 1843 painting of Richard at Arsuf, for the Salles des Croisades at Versailles. Éloi Firmin Féron — public domain · source
Richard I's effigy at Fontevraud
Richard I's effigy at Fontevraud Richard the Lionheart's tomb effigy at Fontevraud Abbey, France. Adam Bishop — CC BY-SA 3.0 · source
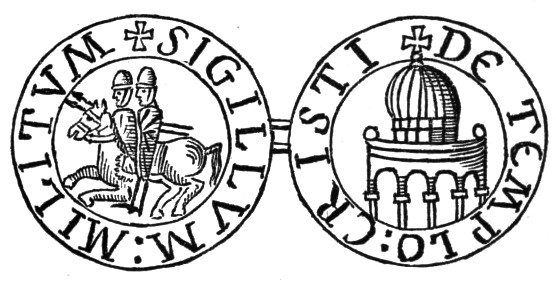
Seal of the Templars
Seal of the Templars Seal of the Knights Templar, who rode in the van of Richard's column. Archer & Kingsford, The Crusades (1894) — public domain · source

Medieval reconstruction. No troop maps survive for this battle. Positions follow the chronicles of both sides and modern studies, numbers are disputed, and the map shows the shape of the battle rather than exact spots.

Free for everyone every year on its anniversary: September 7.

Accuracy score: 57/100 (limited)

How the accuracy score works

Sources and method

Arsuf, 7 September 1191 — a reconstruction. No troop map exists for any medieval battle; contingents are placed from the chroniclers' order of march and from the landscape. Battlefield location: Rafael Y. Lewis, 'Carpe Momento: In Quest of the Material Evidence of the Battle of Arsuf (7 September 1191)', in Apollonia-Arsuf Final Report of the Excavations II (Tel Aviv University, 2020), whose 2013–14 metal-detector survey in the fields between Apollonia National Park, Nof Yam, Road 2 and Kibbutz Shefayim found late-12th/early-13th-century arrowheads, a probable helmet plate, a horse fitting and a 'violin-key' horseshoe nail; reported by Archaeology (AIA, July 2020), Live Science and Smithsonian (August 2020). Lewis places the line of march in the valley east of the first (coastal) kurkar ridge and notes the uncertainty over the old forest edge (Karmon's reconstruction puts it about 3 km inland). Fixed points: Tel Arsuf / Apollonia-Arsuf castle, Kibbutz Shefayim, the Poleg stream ('Rochetaillée', Nahr al-Faliq), the Yarkon (Nahr al-Auja) and Jaffa, from Wikipedia. Primary sources: Itinerarium Peregrinorum et Gesta Regis Ricardi (trans. H. Nicholson, 1997); Ambroise, The History of the Holy War (trans. M. Ailes, 2003); Baha al-Din ibn Shaddad, The Rare and Excellent History of Saladin (trans. D. S. Richards, 2001; C. W. Wilson, 1897), an eyewitness with the Ayyubid centre; Imad al-Din al-Isfahani and Abu Shama. Modern: J. Gillingham, Richard I; R. C. Smail, Crusading Warfare; J. F. Verbruggen, The Art of Warfare in Western Europe; B. Z. Kedar on the battlefield; D. Nicolle; T. Asbridge, The Crusades; Wikipedia, 'Battle of Arsuf'. Strengths are modern estimates (Crusaders about 10,000–20,000 with some 1,200 knights; Ayyubids perhaps 25,000, mostly cavalry); the chroniclers' figures are much higher. The lengths of the divisions, the Ayyubid wing positions and the forest edge are schematic. Images from Wikimedia Commons.

Where the positions come from

Approximate locations